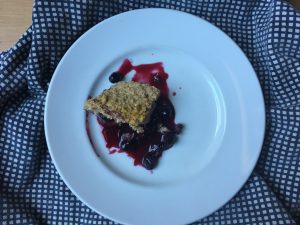
If you’re looking for the picture-perfect, wins-the-county-fair-beauty-contest pie, keep looking, this is not it. But if you’re looking for amazing flavor from super-healthy ingredients … that is also kind of hippy-dippy perfect in a wabi-sabi way, you’re going to love this Berry Crumble recipe!
This weeknight-friendly (fast and easy!) special treat can be pulled together with whatever berries/fruit you have on hand – blueberries, blackberries, strawberries, cherries, boysenberries, etc. … and frozen is a great stand-in when fresh berries aren’t available.
I also recently served this as a side dish with an otherwise super-savory breakfast over the holidays, and it was a big hit.
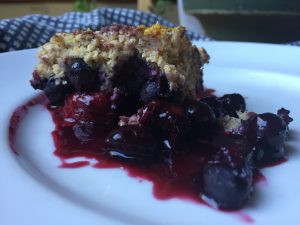
“Embrace the Chaos” Berry Crumble
Ingredients:
(filling) 5 c. fresh or frozen berries – whatever is in season or you have on hand (I love mixing cherries and berries as well!)
2 tbs. lemon juice
2 tbs arrowroot powder
pinch of salt
(crust) 1/2 c. coconut milk
1 tsp. each vanilla + apple cider vinegar
1 1/2 c. oat flour
1 tbs. baking powder
1/4 c. coconut sugar
pinch of salt
3 tbs applesauce
2 tbs nut butter
(topping) cinnamon, turmeric
Click the logo to below cart the recipe, or click here to see all store options.


![]()
1. Preheat the oven to 425 F. Use a pan that is roughly 8×8; line with parchment paper unless it is nonstick.
2. Combine + mix all of the filling ingredients. pour into the pan, cover, and bake for 30 minutes.
3. Stir together the coconut milk and apple cider vinegar. After a few minutes (for it to curdle) add the vanilla
4. Combine the dry ingredients (flour, powder, sugar, salt) in a large bowl.
5. In another small container, mix the applesauce and nut butter well. Once combined, add it to the dry ingredients until the mixture is crumbly. Then gently stir in the coconut milk until just combined.
6. Once the filling is finished cooking, take it out of the oven and reduce the heat to 350 F. Spread the crust over the berry mixture and top with dashes of cinnamon and turmeric (I like a kind of freeform tie-dye look). Cook for 25 more minutes.
7. Remove from the oven to cool; serve it warm.
(Some call this a berry cobbler, others a berry crumble, or a berry pie – whatever you call it, call me to the table when you make it!)