EAT YOURSELF WELL

Inspiration | Information | Recipes

  • Home
  • About
  • Recipes
  • Wellness Retreats
  • Sites We Love
  • Shop
  • Inspiration

Seriously Craveable Cauliflower (yes … cauliflower!)

June 10, 2017 by Jennifer Silverberg 3 Comments

I know, it’s not even cauliflower season right now (they’re available year-round, but best in the fall), but I had a head in the fridge and was looking for an early (and easy and healthy) lunch.

I decided to give it a very simple prep, but one last new addition turned a delicious simple lunch into a culinary experience! Cauliflower recipe below.

Seriously Craveable Cauliflower
1 head Cauliflower
2 Bay leaves
Couple of tablespoons (approx) Herbes de Provence
Salt to taste
Pepper to taste
Red pepper to taste
1 tsp high quality olive oil (approx)
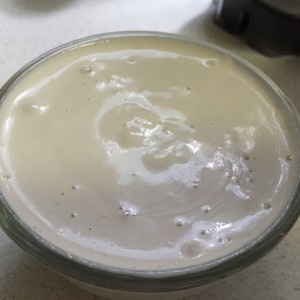
1 tbsp regular or vegan mayonnaise (I love Just Mayo – click here to add it to your cart, but whatever you like best will do)

Wash cauliflower head, removing leaves but keeping the stem and florets intact. Put in a saucepan big enough to fit the full head with the top on, and add about an inch of water. Float both bay leaves in the water, and sprinkle the Herbes de Provence over the cauliflower and into the water. Add the olive oil and a pinch of salt to the water.

Turn on the stove to medium-high until the water boils, then cover and turn down the heat to medium. Cook about 20 minutes, or until the cauliflower is easily cut with a knife. Lift the cauliflower out with a spatula or two, keeping it intact if possible. Put in a low bowl and add red and black pepper, and salt if you like, to taste. Then, remove the bay leaves from the remaining liquid in the pan, stir to add the spoonful of mayonnaise, then pour over the cauliflower.

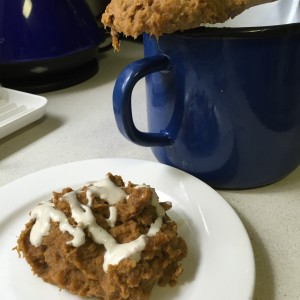
Enjoy immediately. This is beautiful served as a complete head, but if it breaks or if you’d just prefer, you can break the florets apart and it is still lovely and oh, so delicious!

Serves one as a full meal, two as a side.

Filed Under: Recipes we LOVE, Superfoods Tagged With: cauliflower, healthy cauliflower

Seriously Craveworthy Carrots

March 12, 2016 by Jennifer Silverberg Leave a Comment

IMG_8343I was shooting for a quick, healthy way to cook a bag of organic baby carrots … and, OH did I come up with one! Can’t wait to hear if your family loves this as much as I do!

Grab a bag of baby carrots … and cut each one in half lengthwise (so they stay long, but are just thinner). I hear you groaning, but this takes about 4 minutes and gives you way more surface area, which you’re going to want.

Meanwhile (while you’re chopping the carrots), heat a large cast iron skillet up on medium high to high heat – as high as it can take. When it’s hot, add 1 tbsp of coconut oil and let it melt.

When melted, add the sliced carrots (see, that was fast, right?) to the pan and push them around so they are as much in a single layer as possible. Now the important part – DO NOT MOVE them for at least 3-4 minutes, or until you see charred bits developing on some of the bottoms. Really important – it’s the charring that makes a difference. Once the bottoms develop a char, stir them around a bit, let them char some more, and repeat until you’re starting to worry if you’ve cooked these carrots too much (you haven’t). At that point, turn off the heat, sprinkle the carrots with sea salt to taste, and cover. Leave covered for about 3-5 minutes, or until the carrots are fork-tender.

From this point, your choices are:
– Eat them exactly as they are (yeah, I’ve eaten them straight out of the pan, too :-))
– Sprinkle with your favorite vinegar or squeeze of lemon for acidity (my favorite – I LOVE the vinegar – kind of like smoky Salt/Vinegar chips, only clean eating!)
– Toss them in a bit of curry powder, and lime if you like
– Toss in hot sauce and honey

Filed Under: Growing Your Own (Veggies), Healthy Lifestyle, Kids and Food, Make it Crave-Worthy!, Recipes we LOVE, Uncategorized Tagged With: carrots

Quick Sautéed Asparagus Bits – Recipe

September 17, 2015 by Jennifer Silverberg Leave a Comment

Looking for a quick dish for dinner? This quick sautéed asparagus is great tossed over pasta, sprinkled hot over a cold salad, or eaten straight out of the pan :-). Quantities are totally flexible – adjust them to your taste and level of hunger. Enjoy!

This is the first of several quick-fix high-flavor-high-nutrient dishes I’ll be posting. (If this was forwarded to you and you want to be sure to receive the rest, go to www.eatyourselfwell.com to subscribe. And if you forwarded it, THANKS!)

Sauteed Asparagus Bits

Filed Under: Recipes we LOVE Tagged With: asparagus, quick dish, sauteed asparagus

Happy Healthy Birthday!

September 6, 2015 by Jennifer Silverberg 2 Comments

Healthy Birthday Cake

So, today is my birthday – one of the ones that end in “0” and cause you to pause to take stock of where you’ve been and where you’re going with the time you have left. This morning, I’m taking a few moments to give HUGE thanks to the body that has somehow been able to withstand all of the craziness I’ve thrown at it for so many years, and has provided a healthy, strong place to live through it all.

Of course, the LAST thing I want to do to celebrate this milestone is to violate myself with foods that will gunk up the works and negatively impact my health … so I’m making my own version of this “fruit cake!”

Totally wish you all could be here to share it with me – but here’s how to make your own!

Healthy Birthday Fruit Cake!

Ingredients
– One large seedless watermelon
– In-season fruits: melons, blueberries, strawberries, kiwi, pineapple, blackberries, dragonfruit, cherry, apple, bananas, pears, oranges, figs … anything!

Lay the watermelon on its side. Using a large, non-serrated, sharp butcher knife, cut both ends off to form parallel straight edges. Turn the watermelon so that it is sitting flat-sides up and down. Carefully slice within the rind to remove it, leaving a round form. If you’re anything like me, there is still quite a bit of cutting to do to make it even, but all of the trimmings are delicious!

Pro tip: place two plates (slightly smaller than the diameter of the watermelon) on either side of the cake – one on top and one on bottom, and use the plates as guides for your knife. Voila – perfect circle!

Arrange whatever fruit is fresh atop the cake and around the bottom. To make shapes, use a cookie cutter, and then use toothpicks to affix them to the cake (be sure to remove toothpicks from fruit before kids serve themselves).

Cover and refrigerate until ready to serve (serve same-day). For serving, it helps to have an additional bowl of fruit so that you can simply slice the watermelon and spoon the fruit from a bowl.

Filed Under: Healthy Lifestyle, Inspiration, Recipes we LOVE, Seasonal Eating Tagged With: healthy birthday, healthy cake, watermelon cake

Homemade Tomato Jam Crostini – with Lemon Ricotta

July 19, 2015 by Jennifer Silverberg Leave a Comment

My favorite season? Easy, tomato season. I wait for this all year … and when it hits, I’m the first to the Farmer’s market to buy beautiful slicing heirlooms, and then the last to the Farmer’s Market to buy up the scratched/dented/bruised tomatoes for sauces and jams, at a discount. Actually, I owe a shout out to the nice folks at Crystal Organic Farms who are nice enough to set aside their “seconds” for me each week now!

Last week, I decided to turn the bumper crop of beautiful Black Krims into a homemade tomato jam. I made a few different batches to play around with the ingredients and ratios, and this one produced the hands-down favorite!

Tomato Jam Crostini

Lemon Ricotta and Homemade Tomato Jam Crostini

Fresh bread – whole wheat baguette or sourdough are my favorites – thinly sliced on the bias for 4-6 large slices
Fresh whole-milk ricotta – about 1/2 lb
Fine zest of 1 organic lemon
Homemade tomato jam (see recipe, below)
tiny pinch of salt
Freshly ground black pepper
Fresh basil, washed and torn by hand

Zest the lemon into the ricotta, add pinch of salt, and stir. If you can, let sit for 30 minutes or so to let the ricotta come to room temp and to give the lemon a chance to flavor the cheese.

Turn on broiler to start warming. On the stove in a seasoned cast iron pan, grill the thin bread slices on both sides (sure, you can just use a toaster, but grilling is tastier and just as easy!)

Spread the ricotta onto the bread slices and put under the broiler for a few minutes to let it warm and slightly brown. Remove from oven and spread the homemade tomato jam over the ricotta. Top with fresh ground pepper and torn basil to taste, and serve.

Homemade Tomato Jam

About 6 pounds of Black Krim tomatoes, with the cores and seeds removed (NOTES: I do this by coring the tomatoes and then squeezing them – some of the seed are left and I’m OK with that. Also peel them if you’re a purist – I usually just pull the skins out while cooking, and am not bothered if a skin or two is left.)
1 cup cider vinegar
5 garlic cloves, peeled and pressed
4 tablespoons grated fresh turmeric (substitute ginger if you don’t have fresh turmeric)
1/4 cup raw sugar
Grated zest and juice of 1 lemon (be sure to use organic since you’re using the peel)
½ teaspoon ground coriander
1 teaspoon red pepper flakes
1 teaspoon Kosher salt

Put all ingredients into a large pot (do not use uncoated cast iron). Bring to a simmer over medium-high heat then reduce to medium-low and cook, stirring occasionally (more often as it reduces), until jammy. Depending on how well you squeezed the tomatoes, this can take 3-5 hours.

To can the jam: ladle the jam into 3 hot sterilized canning jars, leaving ½ inch of headroom. Seal with hot lids and process the jars for at least 10 minutes.

To store for <1 month (it doesn't last anywhere near that long in my house): store in a covered glass jar in the fridge. Other usage ideas for jam:

Serve over warmed brie, feta, or pretty much any other cheese
Serve over quick-sauteed spinach, swiss chard, or kale
Serve alongside pretty much any egg dish, like quiche or omelettes
Serve on toast in the morning – delicious!
Stir into pan-sauteed fresh corn
Eat straight out of the jar (seriously)

Filed Under: Healthy Lifestyle, Recipes we LOVE, Seasonal Eating, Summer Recipes, Uncategorized

Sweet, Spicy, Savory Rainbow Chard Pasta

April 2, 2015 by Jennifer Silverberg Leave a Comment

This recipe will make chard-haters lick the bowl, I PROMISE. It has a flavor that is hard to explain until you try it … and it’s so easy, fresh, and healthy, you’ve gotta try it!

RainbowChardPasta

ingredients:
~ 1 large bunch multicolored rainbow chard
~ 2 tbsp. olive oil
~ 5 garlic cloves, crushed (you get more flavor and nutrition by crushing them!)
~ 3 tbsp. fresh rosemary, finely chopped
~ 1 tsp red chili flakes (more if you like it spicy)
~ 1 tbsp raw honey
~ 1/2 lemon, juiced
few pinches of sea salt, to taste
black pepper, to taste
pasta

How to Make:
rainbowstemsWash and clean the chard. Fold the leaved in half, and using a small, sharp knive, separate the leaves from the stems. When done, take the stems and slice them in pieces about 1.5 – 2 inches long. Put the leaves in a rough pile (this doesn’t have to be perfect), roll them up, and slice crosswise into 1/4″ strips.

This dish looks so pretty because the stems and leaves are cooked separately, so the stem colors stay strong and they really pop on the plate. You can cook them at the same time in different pans, or one at a time, stems first, in one pan.

First, start your pasta (any kind, enough for 2). It can cook while you’re cooking the chard, but you’ll want it to be ready when the chard is ready.

stemscookingTo cook the stems: place them in a small pan with a few tablespoons of water, a bit of salt, and about 1/2 tsp olive oil. Bring to a boil and then turn down to simmer for about 10 minutes. Add just a bit of lemon juice when you’re adding lemon to the chard leaves, and toss.

garliccookingTo cook the chard leaves: add about 1.5 tbsp of olive oil to a large pan. Add the crushed garlic, chopped rosemary, red pepper flakes, a pinch of salt, and honey. Let cook on medium to medium-high for about 4 minutes until bubbly and just starting to think about browning. Add the chard strips and toss, letting cook for another 5 minutes or so, or until soft and tasty (yes, please taste as you go and correct the salt if needed!). About 2 minutes before it’s done, sprinkle the lemon juice over all and continue tossing. NOTE: the broth flavor in this recipe is AMAZING, so I usually make sure that it has a nice brothy bottom by adding about 1/4 cup of the water from the pasta along with the lemon juice, and cook it down just a bit.

donePlate, starting with the pasta on the bottom, then a nice hearty serving of greens, then the colorful stems on top. Add fresh ground pepper, or not, to taste. Enjoy!

Filed Under: Recipes we LOVE, Seasonal Eating, Summer Recipes Tagged With: quick healthy meals, rainbow chard, rainbow chard pasta

7 Tips in 7 Days: Eating Consciously, Day 2

March 4, 2015 by Jennifer Silverberg Leave a Comment

Another unconscious eating trap I’ve seen (and experienced) is forgetting about the visual part of eating. Marketers know that if you have a beautiful table setting and food arrangement, diners will mistake fast food for haute cuisine. And many dieters have reported that when they involve several senses in their meals, they feel full faster and longer! So, it’s worth the few extra moments it takes to think through how to make your meal more visually appealing: thoughtful plating, a sprinkle of fresh parsley, or similar! And just in case you’re interested, the simple recipe for the mushroom salad is below.

Eating Consciously Tip 2

Super-Simple Mushroom Pasta Salad (pictured above)

Serves 2

3 cups (or more if you like) of fresh mushrooms – whatever you have on hand – cleaned and chopped if they are large
3 cups (or more if you like) of greens – a mix of bitter winter baby greens is delicious with this
1 cup of cooked pasta (dried or fresh)
Couple of dashes of vinegar (I prefer white wine vinegar)
Two “glugs” of high quality olive oil – one for the pan, one for the salad
Salt
Pepper

Prep the mushrooms and heat a cast iron or similar skillet with a bit of olive oil. When hot, toss in the mushrooms, and cook for about 10-15 minutes over medium-high heat, stirring/flipping occasionally, until slightly browned.

Note: do not use a nonstick pan if you can help it. In addition to releasing chemicals, these pans keep the mushrooms from browning properly.

In the meantime, wash the greens, cut if necessary, and dry. First toss in the vinegar, then a pinch of salt, then toss with olive oil. (Order is important – if you start with the olive oil, the vinegar will slide off.)

When the mushrooms are ready, toss in the cooked pasta (great way to use cold leftover pasta) until the pasta is warmed through. Add fresh ground pepper, taste, add salt if needed, and then plate the salad with the mushroom/pasta mix over it.

Filed Under: Cooking Tips, Fast Recipes, Food Choices, Recipes we LOVE Tagged With: eating consciously, mushroom salad, tips for eating consciously

Magnificent Mushrooms: 4 to Know

February 28, 2015 by Jennifer Silverberg Leave a Comment

A little secret: I used to think I disliked mushrooms … but the only ones I’d had were those crazy little white button mushrooms that come pre-washed and wrapped in plastic, for who knows how long. A few years ago, the local mushroom growers at my farmer’s market opened my eyes and now I’m positively addicted, and super-thankful for it!

You know I love things super-simple, so it’s probably no surprise that my favorite way to cook them is an easy sear of trimmed (but not chopped) mushrooms in a single layer in a cast iron pan with olive oil and a pinch of salt. Sometimes my family and I stand over the pan and eat them hot and crispy, before they ever make it to the table. Occasionally I get fancy and add shallots and a bit of white wine at the end, but really, there is nothing like hot and crispy mushroom bits fresh out of the pan.

And the best part? Inside all this deliciousness lives all of these benefits!
4 Mushrooms to Know - Jennifer SIlverberg

Filed Under: Nutrition News and Ideas, Recipes we LOVE, Superfoods Tagged With: healthy mushrooms, mushrooms, types of mushrooms

Cashew Cream Sweet Potato Mash

February 26, 2015 by Jennifer Silverberg 3 Comments

File this under “necessity is the mother of invention!” We don’t get much snow where I am, but we got a dusting yesterday. So, the roads closed right about the time I got to the bottom of my veggie crisper – oh, no!!

Lunch today meant getting a little creative with the giant (SERIOUSLY giant) sweet potato I had on the counter, and some cashews from the fridge. And it turned out AMAZING. Give this a try, even if it’s not the last food you have left in the house!
Cashew Cream Sweet Potato Mash

Ingredients

Potatoes
– 2 large sweet potatoes (or one freakishly large one – I think I had a 2-pounder!), sliced into 1-2″ chunks
– 1 tbsp coconut oil (or olive oil if you don’t have coconut)
– 1/2 cup water
– 1 tsp cinnamon
– 1/2 tsp cumin
– sprinkle of salt

Cashew Cream
– 1 cup fresh, unsalted cashews
– water
– 1 tbsp maple syrup
– 1 tsp vanilla
– 1/4 cup Dried coconut flakes, unsweetened (can be omitted)

Heat the oil in a large pan, add the sweet potatoes, sprinkle with the spices, stir, and brown for about 5 minutes. Add the water, stir, cover, and cook for about 20 minutes or until the sweet potatoes are soft.

IMG_1321In the meantime, in a high-speed blender (like Vitamix), add the cashews, maple syrup, vanilla, and coconut flakes, add water to come to just the top of the cashews, and blend until super-smooth and creamy, with no trace of the nuts.

When the potatoes are ready, put them in a bowl, and mash them with the cashew cream to taste. Top with a little more, just for fun.
IMG_1329
NOTE: You will have leftover cashew cream, which is AWESOME. Use it as an amazing fruit topping, in smoothies, over any baked goods (bread, whatever), eat it straight from your bowl as a treat, or just make more sweet potatoes tomorrow!

Filed Under: Recipes we LOVE, Superfoods, Winter Recipes Tagged With: Jennifer silverberg, simple, sweet potatoes

Health-Preserving Quick Veggie Noodle Soup

February 24, 2015 by Jennifer Silverberg 4 Comments

Healthy Veggie Pot

There’s not much cooking here, but a fair amount of chopping. It helps if you have a grocer with a good salad bar nearby … but even if not, it’s about 5 minutes of chopping, and I promise it’s well worth it!

2 quarts water
1 cup Broccoli florets, in small pieces
1-2 cups Sugar snap or Snow peas
2 Carrots, cut into matchsticks
4 Shiitake mushrooms, cut into matchsticks or finely diced
2 Chinese napa cabbage and/or bok choy, finely shredded
handful Bean sprouts, well rinsed

2 tbsp Sesame oil
2 Garlic cloves, pressed or cut to small dice
1 Small piece ginger, cut to small dice
1/2 Onion, finely diced
2 Scallions, sliced lengthwise, very thinly

2 1/2 cups vegetable or miso broth (or 2 1/2 cup Water + 1 tsp stock granules)
2 cups Udon, soba or rice noodles – cooked ahead/separately, or with the soup, per the below

Optional add-ins
Tamari or soy sauce
Asian Hot pepper sauce
Lime (wedges)
Cilantro

CLICK HERE TO SEE SOME OF MY FAVORITE INGREDIENTS!

Put water on to boil, and prep the broccoli, peas, and carrots. Toss into the water and cook for 5 minutes. While the veggies are cooking, prep the mushrooms and cabbage. With a strainer, remove the vegetables (leaving water boiling) and rinse in cold water, and set aside. Add the mushrooms, cabbage, and bean sprouts to the boiling water, cook for one minute, then rinse in cold water, and add them to the rest of the veggies.

In a large pot, heat the sesame oil over medium heat, and add the garlic, ginger, onion, and scallions and cook for about 5 minutes until soft. Remove from heat, and carefully (so it doesn’t splatter) add the broth and 1/2 to all of the cooking water from the veggies. If you want the soup brothy, add more; if not, add less.

Add the noodles to the soup (using rice noodles will keep the broth nice and thin, as they’re less starchy), and cook until the noodles are ready. Add the veggies back in, top with sauces as desired, and serve.

Developed and posted by: Jennifer Silverberg, Eat Yourself Well

Filed Under: Fast Recipes, Recipes we LOVE, Winter Recipes Tagged With: soup, vegan soup, veggie noodle soup

  • « Previous Page
  • 1
  • 2
  • 3
  • 4
  • …
  • 8
  • Next Page »

Are you ready to…

Lets get social


Want more? Follow us on social media.

Take a look around

Favorite Posts

Recent Posts

  • COVID Has Reminded Us: Health REALLY Matters
  • Amazing and Easy Banana Bread
  • Healthy Resolution!
  • Happy Healthy Christmas Salad!
  • Quick Comfort Food: Grits and Greens (Plant Based!)

Popular Posts

101 Fast/Healthy/Fabulous Snack Ideas

Copyright © 2025 · Foodie Child Theme by Shay Bocks · Built on the Genesis Framework · Powered by WordPress