EAT YOURSELF WELL

Inspiration | Information | Recipes

  • Home
  • About
  • Recipes
  • Wellness Retreats
  • Sites We Love
  • Shop
  • Inspiration

Quick guide to sprouting!

October 11, 2014 by Jennifer Silverberg Leave a Comment

SproutingSuccess
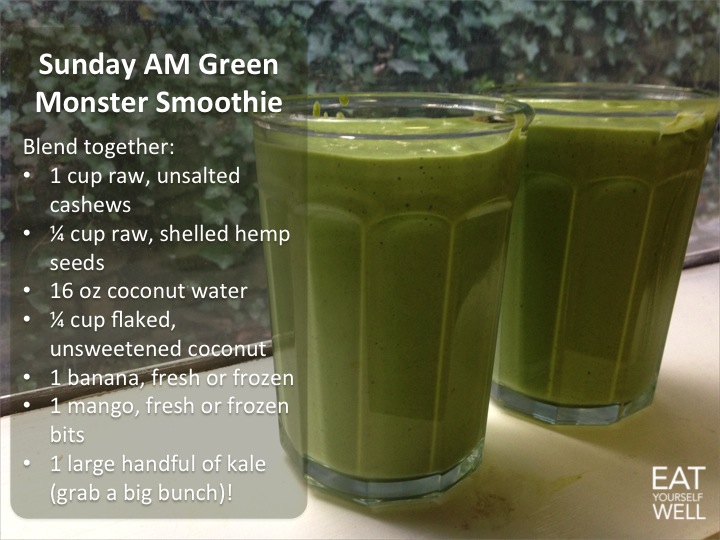
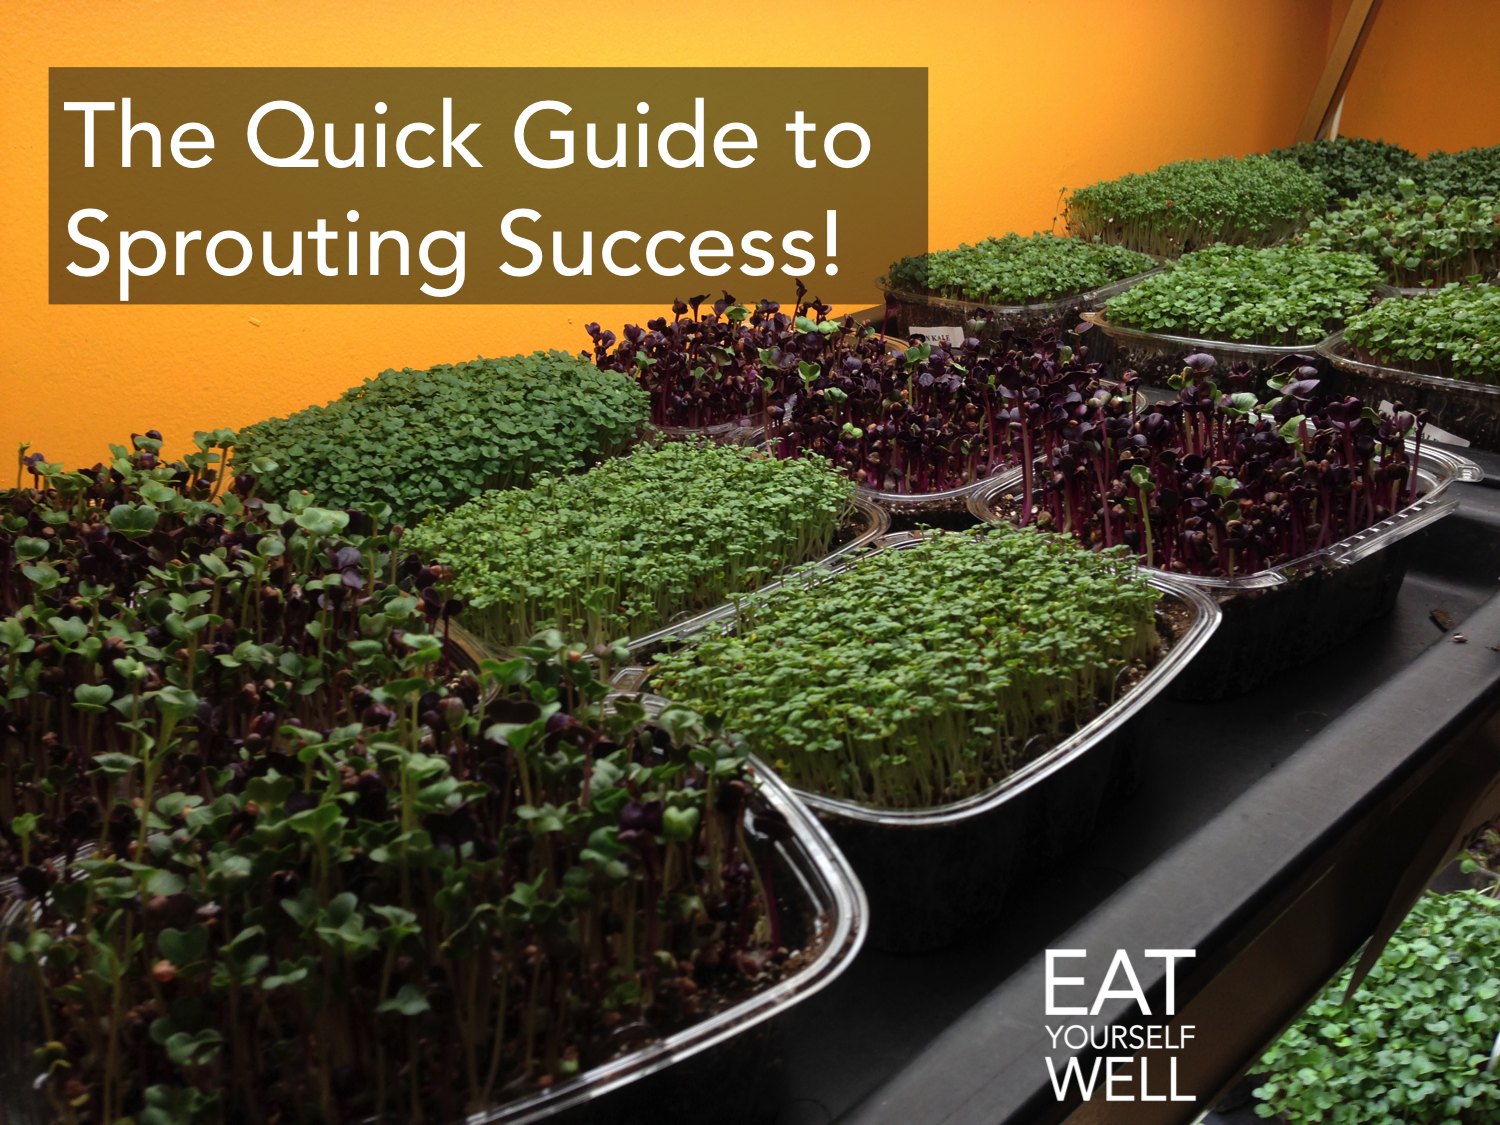
Sprouting is a lot easier than it seems, and you’ll be amazed at how a tiny bit of seed can make piles and piles of sprouts for your sandwiches, salads, casseroles, etc. They’re also great by the handful as quick snacks!

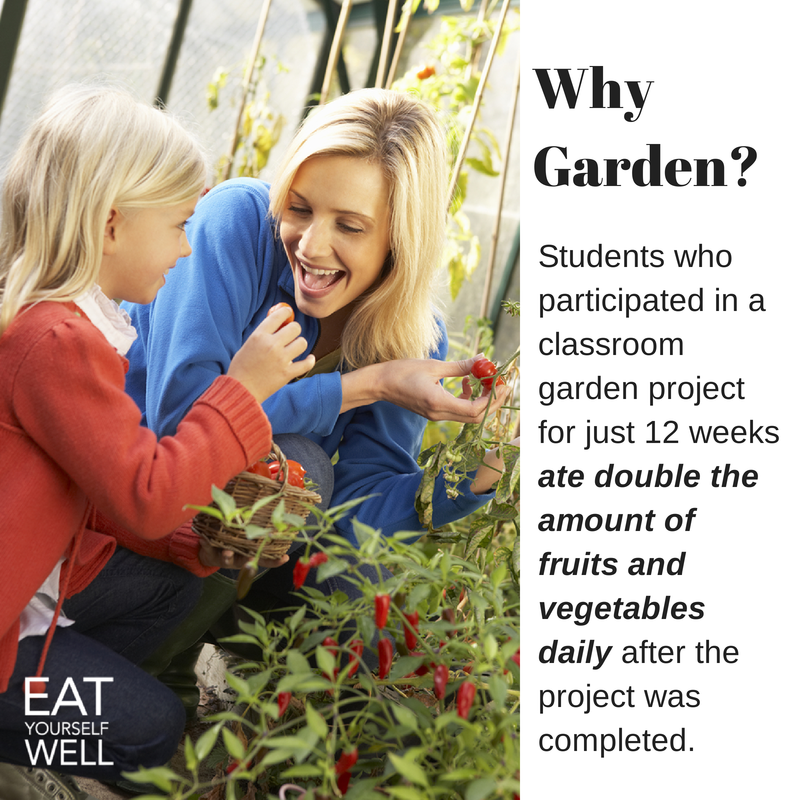
Be sure to involve the kids – you’ll be amazed at how they’ll want to eat the sprouts they grow!

What Equipment Do I Need to Make Sprouts?

A container
Options are almost all affordable (<$20), and range from simple containers with built-in sieves to multi-tiered versions for sprouting several varieties at once. You can also use a simple glass jar with mesh/cheesecloth secured by a rubber band over the opening or screening fastened by a metal, screw-top ring, like this one from Amazon.

Water
Use fresh, clean water (non-chlorinated is best).

Untreated seeds
A few tablespoons of small sprouting seeds (like alfalfa or clover) to half a cup of seed (for large seeds like lentils or beans) are all you need to produce sprouts for sandwiches, salads, and other dishes. Sprouts will double or triple in size, depending on the size of the seed and the variety you are sprouting. Start small, to help ensure you don’t end up with sprouts going bad in your refrigerator. Seeds and mixes are available online from sprout and seed companies, from Amazon, or at your local health food store. You may want to try mixes that include more than one seed type, which can add a nice variety to your sandwiches and salads.

To sprout

  • Rinse seeds under water to clean them and remove any dust or dirt.
  • Spread them evenly in your container to form a thin layer. Do not let them pile on top of one another.
  • Cover your seeds completely and soak for 6-12 hours. (Be sure to poke down any floaters.) This helps encourage sprouting.
  • Drain water from the seeds and keep moist. If using a jar, try laying on one side for more even distribution.
  • Rinse and drain 2-3 times per day. Rinse sunflower seeds more frequently, since they will get slimy. Rinse or pick off seed skins to prevent rotting.
  • After your seeds have sprouted, rinse and drain regularly (every 8-12 hours) until sprouts reach the desired length.
  • Eat fresh or store in the fridge until consumed. Most sprouts last 1-2 weeks when kept cool.
  • Average Number of Days to Finish Sprouts
    Lentil Sprouts: 3-4 days
    Mung bean Sprouts: 3-5 days
    Radish Sprouts: 4-5 days
    Mustard Sprouts: 3-6 days
    Alfalfa and Clover Sprouts: 5-6 days

    Filed Under: Growing Your Own (Veggies), Kids and Food Tagged With: eat yourself well, how to sprout, sprouts

    Recipes for Wednesday, September 24 – Real Food Challenge

    September 21, 2014 by Jennifer Silverberg Leave a Comment

    FreekehThe Real Food $100/4/7 ChallengeHappy Wednesday – this freekeh salad is amazing. Note: when you make the freekeh, go ahead and make a double batch and refrigerate half for the pilaf later in the week – it keeps beautifully.

    Enjoy the day, and please don’t forget to let us know how your family is doing, by posting on the Facebook page, or below.

    Wednesday Breakfast: Eat Yourself Well Nut Butter-Banana Rollups

    4 wheat tortillas
    2/3 cup nut butter (peanut, almond, whatever you have on hand)
    4 medium bananas
    Honey, if desired

    Spread each tortilla with nut butter, spreading fairly evenly but not going all the way to the edge. Place a banana at one end, add a bit of honey if you like, and roll the tortilla around it. Cut in half if serving immediately, or leave whole if carrying to work or school.

    Wednesday Lunch: Eat Yourself Well Hearty Freekeh and Kale Salad

    Ingredients:
    • 1 C freekeh
    • Juice from 1 large lemon (about 5 tbsp)
    • 3 tbsp olive oil
    • 4 cloves garlic
    • 1 tsp dijon mustard
    • 2 tbsp nutritional yeast
    • ¼ tsp freshly ground black pepper
    • 2 tbsp chia seeds
    • ¼ C chopped green onion
    • ½ C toasted, salted pumpkin seeds
    • 2 apples, cored and diced
    • 6 C kale, roughly chopped

    1. Place 2.5 cups cold water, 1 cups freekeh, 1 tsp. salt, and 1 tbs. olive oil (optional) in a large saucepan. Bring to boil, stirring occasionally. Cover the saucepan with a tightly fitting lid. Lower heat and simmer for 10-15 minutes if cooking cracked freekeh, and 40-45 minutes for whole freekeh.
    2. Combine the lemon juice, olive oil, garlic, dijon and nutritional yeast in a food processor, and puree. Add the chia seeds, stir, and let it sit while you prepare the rest of the salad so the chia seeds have time to expand.
    3. Toss kale, cooked farro, pumpkin seeds, and apple together in a large bowl. Serve with lemon and chia dressing.

    Wednesday Dinner: Eat Yourself Well Veggie-licious Chili

    2 (15-16 oz.) cans of kidney beans, drained
    1 diced sweet potato
    2 cups diced kale
    1 can (12 oz.) tomato paste
    1 ear corn, kernels cut off
    1 onion, chopped
    1 tsp. salt
    1 tsp. chili powder (more if desired)
    3 cups water
    4 tbsp cheddar cheese
    Dollop of plain greek yogurt
    Salt/pepper to taste

    1. Combine all of the ingredients, reserving half of the corn, in a large pot; and simmer for at least 30 minutes or until sweet potato is soft, stirring occasionally. Add water if mixture becomes too thick. Adjust salt/pepper as needed.

    2. Top with reserved corn, cheese, and greek yogurt.

    Filed Under: Real Food Challenge, Recipes we LOVE Tagged With: eat yourself well, Real Food Challenge

    Celebrate yourself!

    September 3, 2014 by Jennifer Silverberg Leave a Comment

    Celebrate Yourself - Eat Yourself Well

    Filed Under: Inspiration Tagged With: eat yourself well, eating, Food, health, plate, self-worth

    Chocolate Strawberry Protein Loaf

    August 29, 2014 by Jennifer Silverberg Leave a Comment

    New recipe came in from a fan – I tried it, and WOW, it was amazing. I’m not usually a fan of protein powder, but for this use I think it’s better than the alternatives, and definitely pumps up the protein count for you athletes out there. As always, use organic ingredients, and if you are vegan, use chia and water to substitute for the eggs. Here you go!

    Chocolate Strawberry Protein LoafDARK CHOCOLATE & STRAWBERRY PROTEIN LOAF

    From: Ross Edgley at http://www.facebook.com/rossedgleywriter Visit his page for more great recipes!

    This not only tastes great but all the ingredients are healthy, ‘functional’ and especially good after a hard gym session :- ) and here’s why. It’s made of foods that all have health and performance benefits. From the flavanoid content of the dark chocolate to the vitamin C content of the strawberries. Essentially it’s very nutrient dense! Plus, has a great carbohydrate to protein ratio to help the muscles and body recover immediately after training.

    Ingredients:
    – 30g Whey Protein (dark chocolate flavour best)
    – 2 whole eggs
    – 50g dark chocolate (ideally 85% cocoa since far healthier)
    – 30g coconut flour
    – 20g oats (can be gluten free oats)
    – 200ml almond milk
    – 1 banana
    – 20g of strawberries and blueberries
    – Baking powder (1/2 a teaspoon)

    Method:
    – Pre heat oven to 250
    – Mix ingredients into a bowl (whey, eggs, coconut flour, oats, almond milk and ½ a tsp of baking powder)
    – Mash a banana and add to mixture
    – Whisk until mixture is light and almost frothy
    – Add more almond milk to achieve the right consistency, like batter
    – Then add dark chocolate and berries into the mixture
    – Line loaf tin with greaseproof paper or coconut oil
    – Pour in the mixture
    – Place the loaf tin into oven and cook for 40-60 minutes (if you have a good oven it may be shorter so be sure to pay attention to your loaf whilst cooking and use a toothpick or knife to check as it’s baking)
    – Remove, top with a few berries and enjoy

    Nutritional Information (for 1/6)
    – 190 Calories
    – 21g Protein
    – 38g Carbohydrates
    Serving suggestions:

    *Also goes very well with natural yoghurt. Especially if you find the texture too dry, this balances it out perfectly.

    *Note: A little science to finish Some people are concerned about eating too many carbohydrates but the truth is immediately after training you can pretty much eat what you want and it won’t be stored as fat! It will only be used to help the body recover. This is because your muscles are depleted and your insulin sensitivity (how we absorb and use carbohydrates) is elevated so anything we eat is absorbed like a sponge by the muscles. Don’t believe me check out this study below Basically if you’ve trained hard, go home, eat and enjoy this completely guilt free. You’re body will actually thank you for it

    References:
    Veikko A. Koivisto, Hanele Yki-Järvinen andRalph A. DeFronzo (1986) “Physical training and insulin sensitivity” Diabetes/Metabolism Reviews, Volume 1, Issue 4, pages 445–481, 1986

    Filed Under: Gluten-Free, Healthy Treats, Recipes we LOVE Tagged With: dark chocolate, eat yourself well, protein loaf, Ross Edgley, strawberry

    Sunday (or Any Day) AM Green Monster Smoothie

    August 13, 2014 by Jennifer Silverberg 1 Comment

    Green Monster Smoothie - Eat Yourself Well

    I know this says “Sunday,” but I think it would be perfect for just about any morning, right? This Green Monster Smoothie is a great way to stay fueled through lunch, and even beyond for when those work meetings run long …

    Filed Under: Breakfast Recipes, Juices and Smoothies, Recipes we LOVE Tagged With: eat yourself well, green smoothie, Green smoothie coconut water

    Eat Yourself Well!

    August 12, 2014 by Jennifer Silverberg Leave a Comment

    Hippocrates - Eat Yourself Well

    Filed Under: Inspiration Tagged With: eat yourself well, food cures, Hippocrates

    5 Fresh & Fast (and simple) Fig Recipes

    August 4, 2014 by Jennifer Silverberg Leave a Comment

    Five Fresh Fast Fig Recipes - Eat Yourself Well

    Last week, my figs were tiny and green – this week, they’re ripe – ALL of them! Following are a few ways I’m going to make use of these amazing fruits – in addition to eating them right off the tree, when the birds don’t get to them first!

    Crispy Broiled Figs: Melt a bit of coconut oil with honey (just a little of each). Lay figs halves on a baking sheet. Brush with melted mix. Broil until the fig tops bubble and start to brown on the edges. Serve as a side dish with veggies, or add a bit of marscapone for a wonderful earthy dessert.

    Fig Bruschetta: Finely dice fresh figs, and toss with a splash of balsamic vinegar and one good grind of black pepper. Top toasted baguette slice with a bit of ricotta or marscapone cheese, top with fig mix

    Cheesy, Melty Figs: Chop the top half off the fig (reserve for Bruschetta, above :-)) and slightly “open” the bottom half. Add a soft cheese: a nice ripe bleu, robiola, or a bit of brie. Place under broiler until cheese is melted, serve immediately, alone or over mixed greens as a salad.

    Fig, Walnut, and Goat Cheese Salad: Cut/crumble all into pieces and toss with mixed greens. Top with a quick mix of balsamic vinegar, dijon mustard, and the best olive oil you can find.

    Gingered Fig Martinis (over 21 only): Blend 2 cups figs, 1 small knob of ginger (less for less spicy, more for more) 2 tsp water and the juice of 1/2 to 1 lemon (depending on size) in the blender. Pour over ice in cocktail shaker, add vodka to taste and shake well. Pour into chilled martini glass.

    From Jennifer Silverberg at www.EatYourselfWell.com and facebook.com/eatyourselfwell Please maintain link as you copy and share recipe with others!

    Filed Under: Breakfast Recipes, Fast Recipes, Healthy Treats, Recipes we LOVE, Summer Recipes Tagged With: eat yourself well, fig, fig recipes

    Popeye’ Secret Smoothie – Delicious Spinach Smoothie

    August 4, 2014 by Jennifer Silverberg 1 Comment

    Delicious Spinach Smoothie - Eat Yourself Well

    Popeye’s Secret Smoothie

    Maca, yogurt, and lime combine to make this refreshingly citrusy – banana adds luscious texture and sweetness. Your kids will love to “drink like Popeye!”

    All of the following measures can be used approximately and altered to fit your taste.

    Yield: 2

    Lots of spinach!

    Ingredients:

    2 loosely packed cups spinach leaves
    1 cup coconut water
    1 banana, preferably frozen
    1 lime, squeezed (2 if there is very little juice) – or if you don’t have a lime, use lemon
    4 tbsp raw organic maca
    3/4 cup yogurt, plain (regular or coconut, for a vegan version)
    1/4 cup chia
    2 dried figs
    Honey or maple syrup to taste, if you like your smoothies sweet

    To Make: Add all of the ingredients to a high-powered blender, and mix. Tamp down as needed to make sure everything blends completely. Taste and adjust sweetness if needed. Enjoy the rush of power!

    From Jennifer Silverberg at www.EatYourselfWell.com and facebook.com/eatyourselfwell Please maintain link as you copy and share recipe with others!

    Filed Under: Breakfast Recipes, Juices and Smoothies, Kids and Food, Recipes we LOVE Tagged With: delicious smoothie, eat yourself well, spinach, spinach smoothie

    Gardening – One great reason why … and three ways to keep it super-simple!

    August 1, 2014 by Jennifer Silverberg Leave a Comment

    Why garden?

    That’s one great reason to try gardening … and then there’s money savings, taste, nutrition, and I could go on and on! However, I struggle with it for years until I realized the three things that made it workable for me (a crazy busy mom with a career or two going on).

    1. Forego digging … forever. The best thing I ever did was buy my handheld tiller (I use this super-simple Mantis), which gets me to the fun part, faster. When I used to have to face down hours with the shovel, and the resulting clods of dirt/clay (I live in GA), I tended to put off planting until it was too late. Oh, and your back will thank you, too.

    2. Select a manageable number of plants, and stick to those few. When I bought “a little of everything,” and just stuck it in the ground and hoped for the best, about half of it failed. Now, we stick to the 5 (for me, that’s the magic number) foods that my family loves the most in the summer, and then plant greens around them for the fall. You can always trade with friends who are growing other things, and supplement at the farmer’s market.

    3. Use soaker hoses. Buy enough non-toxic hoses (here’s why) – once – to lay them down your rows of plants, and leave them there the whole growing season. Dragging a hose all around your garden is a daily … drag. Setting them up once is an hour or so project. After that, all you have to do is turn on the hose for a bit, and then remember to turn it off (set a timer if you’re anything like me).

    That’s what helped me – hope it helps you get gardening this season!

    From Jennifer Silverberg at www.EatYourselfWell.com and facebook.com/eatyourselfwell Please maintain link as you copy and share recipe with others!

    Filed Under: Food Supply, Growing Your Own (Veggies), How to Live Tagged With: eat yourself well, garden, Mantis, seed to table, vegetables

    Open Faced Egg Sandwich, with Arugula-Basil Pesto

    July 27, 2014 by Jennifer Silverberg Leave a Comment

    Open Faced Egg Sandwich with Arugula Pesto - Eat Yourself Well

    Ingredients:

    For each open-faced egg sandwich:

  • One slice bread
  • Two eggs fried in olive oil (done to your preference)
  • One slice homemade or farmer’s market honey wheat bread (or any bread, but the honey wheat combines nicely with the pesto)
  • 2-3 tbsp Arugula Basil Pesto (recipe below)
  • 1/4 cup arugula
  • Prepare Arugula Basil Pesto – recipe below. Make the full recipe even if you won’t use it all now – it is great on pasta, salads, and roast vegetables too! You can also freeze it in cubes for later!

    Directions

    Put bread in toaster.
    Fry two eggs in coconut oil.
    When toast is ready, add 2-3 tbsp (or to taste) of the Pesto. When eggs are ready, place them over the pesto, then sprinkle with arugula. Serve immediately, preferably with wonderful coffee!

    Arugula Basil Pesto

    2/3 cup raw almonds (you can also use pine nuts, but I prefer almonds as they are higher protein)
    1 cups fresh basil leaves
    3 cups fresh arugula
    3 cloves fresh garlic
    1/2 cup extra virgin olive oil
    1 tbsp freshly squeezed lemon juice
    Optional: 1/2 cup fresh parmesan, grated
    salt, to taste
    pepper, to taste

    Toast almonds on medium-high heat for about 3-4 minutes, or until they are warmed and just slightly fragrant. Let cool a few minutes.

    Place almonds, basil, garlic, lemon juice, salt, and pepper into a food processor and pulse until well blended. With the blender still going, add in the olive oil and blend until smooth, scraping the sides as needed. You may want more or less olive oil – taste and adjust if you like.

    Use immediately or store in the fridge in an air tight container for a few days.

    From Jennifer Silverberg at www.EatYourselfWell.com and facebook.com/eatyourselfwell Please maintain link as you copy and share recipe with others!

    Filed Under: Breakfast Recipes, Recipes we LOVE Tagged With: arugula basil pesto, eat yourself well, egg sandwich, garlic and eggs, recipe

    • 1
    • 2
    • 3
    • Next Page »

    Are you ready to…

    Lets get social


    Want more? Follow us on social media.

    Take a look around

    Favorite Posts

    Recent Posts

    • COVID Has Reminded Us: Health REALLY Matters
    • Amazing and Easy Banana Bread
    • Healthy Resolution!
    • Happy Healthy Christmas Salad!
    • Quick Comfort Food: Grits and Greens (Plant Based!)

    Popular Posts

    101 Fast/Healthy/Fabulous Snack Ideas

    Copyright © 2025 · Foodie Child Theme by Shay Bocks · Built on the Genesis Framework · Powered by WordPress